When the local drag strip decided to halt drag racing, Carl begrudgingly had to shift the “philosophy” of his build. More on that in a moment. If you missed any previous episodes for Carl’s 10-second turbo build, (or need a review), here are the links: part one, part two, part three, part four, part five, and part six. Each episode is a quick read, with lots of pictures. If you want some short but cool videos, episode two has our first start-up video showcasing that monster turbo, and episode three has a video showing Carl’s custom-coded trans controller working flawlessly with the turbocharged engine and transmission.
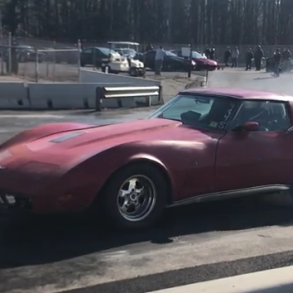
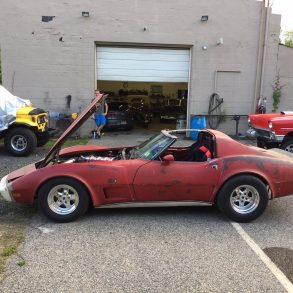
Viewer Advisory: This build has some serious meat on the bones, as Carl has some crazy technical skills (especially with electronics), and he is going to tap into all of them to turn his 1977 Stingray into a 10-second quarter-mile monster!
“A knife in the heart“
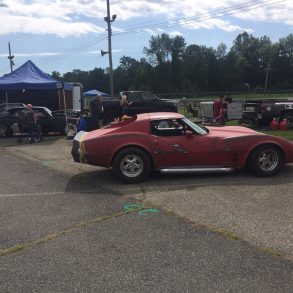
That is how Carl described the moment he heard about the decision from his local track to nix drag racing from their venue, and he explains, “Now if I want to go drag racing, I have to drive an hour and forty-five minutes each way (without traffic). The Vette just became more of a cruiser than a drag car. Air conditioning is back in the mix, but this presents a few problems. One problem is having to give up power steering to trade the space taken by the power steering pump.”
So, does this mean Carl will be watering down the horsepower goals for his build? Absolutely not, but it does mean more work to get that air conditioning up and running with the limited space. Here is the A/C kit.
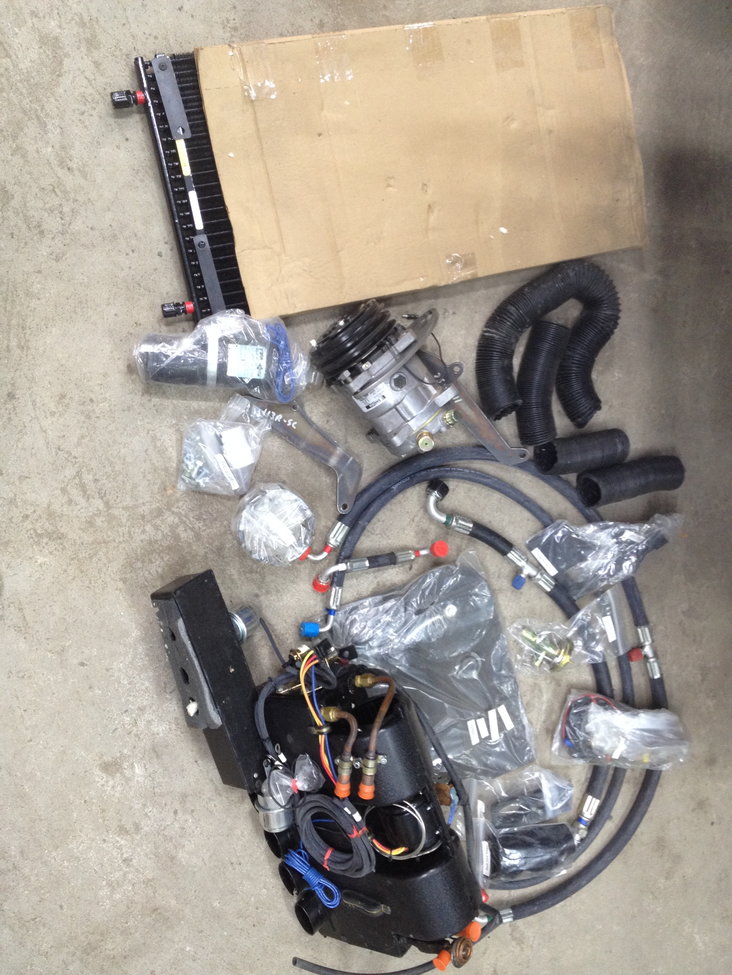
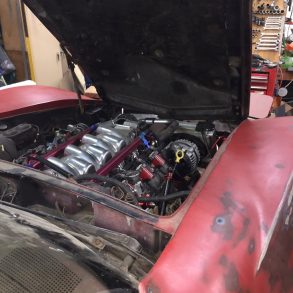
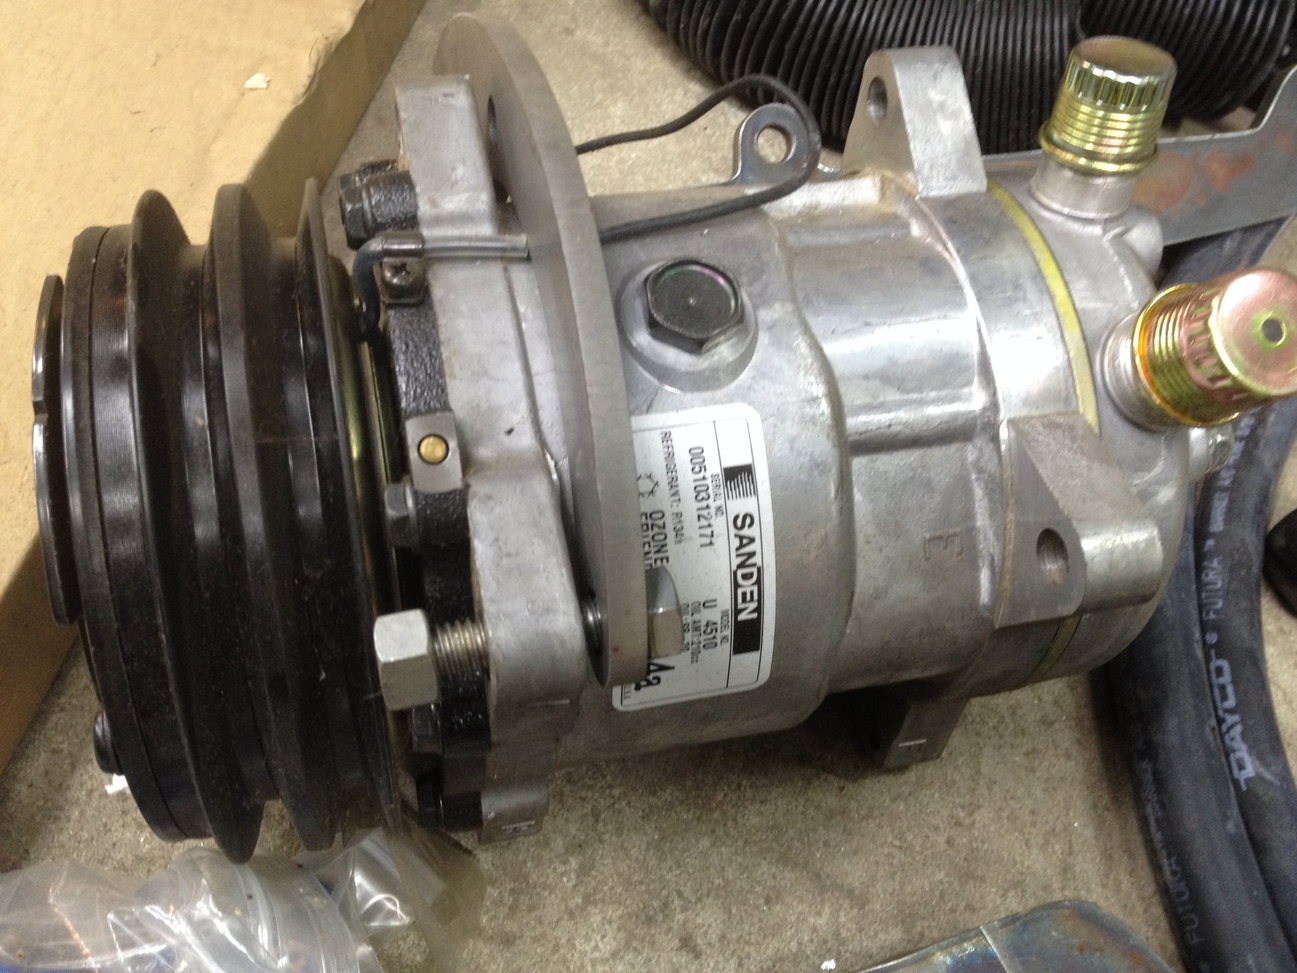
The first hurdle? Well, the compressor is a V belt, but Carl’s setup is serpentine, and Sanden does not make a 6-tooth V belt setup for this compressor.
The solution? As with most of Carl’s projects, this one was detailed:
“Took apart the A/C compressor clutch and pulley assembly A friend had a 7 groove serpentine Power steering pulley from a Range Rover that he donated. I then machined off the V Belt part of the old pulley leaving a 1/4 of the v belt pulley and a flat for the rest of it. Then I machined a hole in the Range Rover pulley with a friction fit to the flat part where the rest of the 2 V belts used to be. And I machined off one of the 7 Range Rover grooves and joined the two together.
So now the outside of the first groove is from the Vbelt and the rest of the six grooves are from the Range Rover. Then I gave it 4 tack welds (it was already very tight and might not have needed the welds) and it came out great. The original kit’s compressor brackets were for an SBC and on the passenger side. I modified them to fit on the LS and on the driver’s side.”

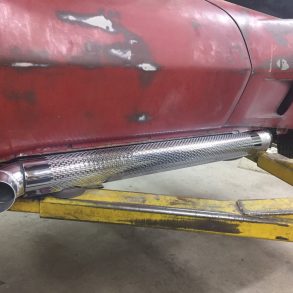
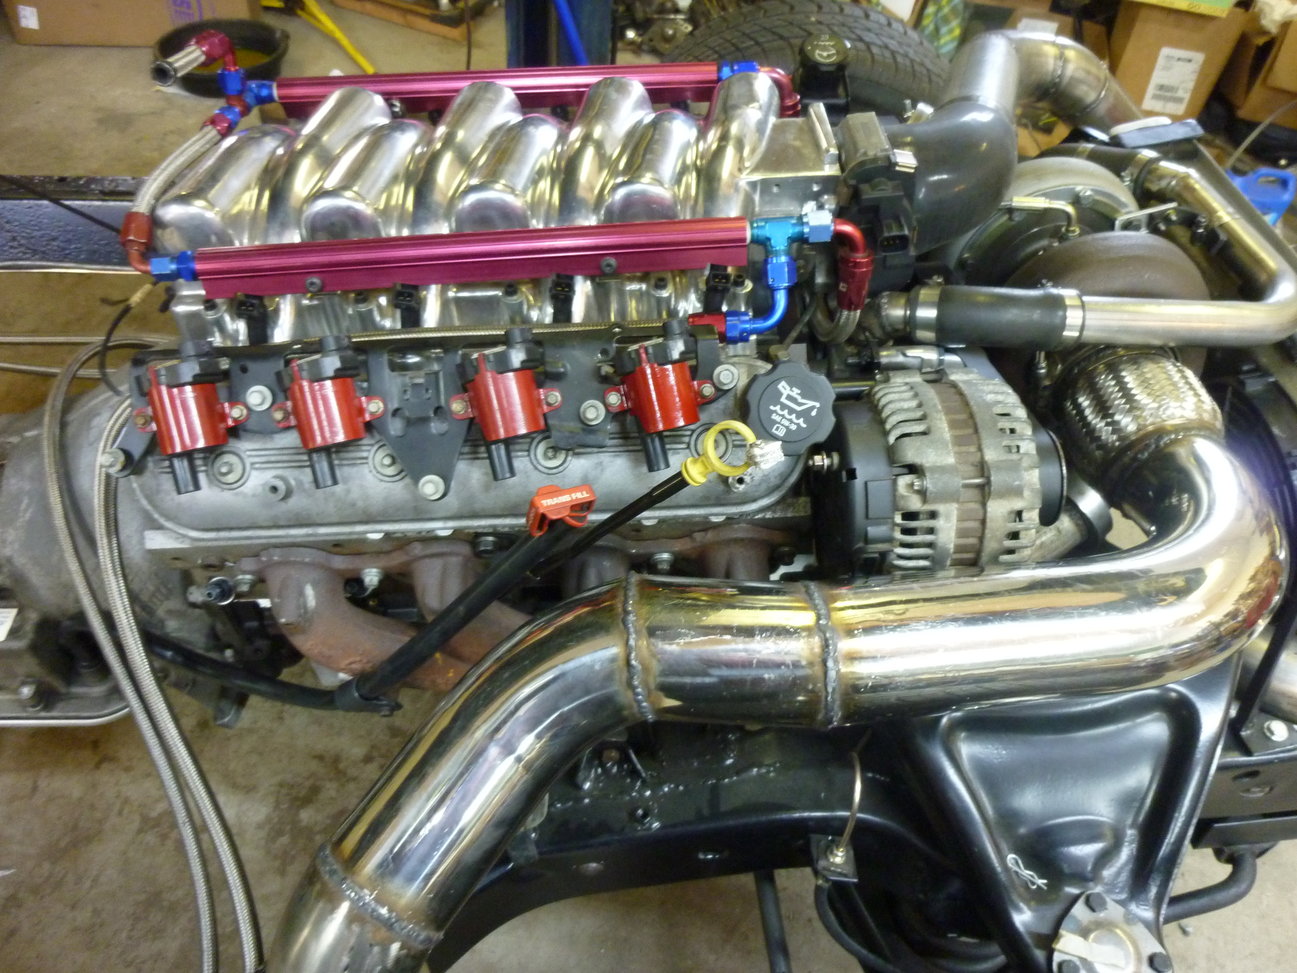
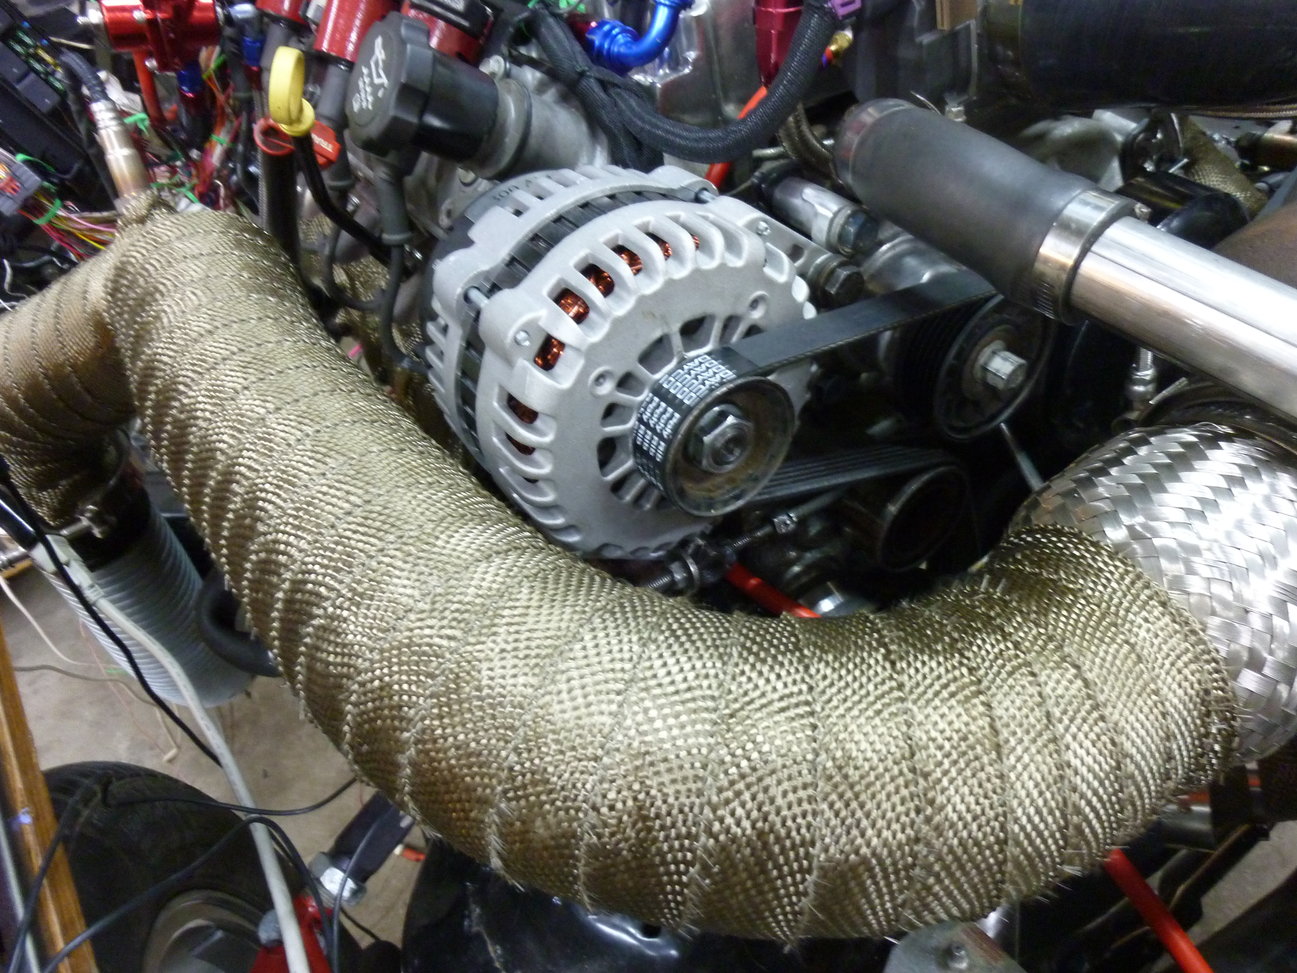
Wow, what a mouthful and what a meticulous fix! Now Carl can do turbo blasts around town with some cold a/c blasting on his face. Next up is a new 300 amp alternator, as Carl comments, “In addition to the 2 fuel pumps there are 2 intercooler fans, 2 radiator fans, an oil cooler fan and a trans cooler fan. I also header-wrapped the headers and down pipe.”
Now, back to a deep dive into some of the electronic wizardry and coding that Carl is implementing on this unique build.
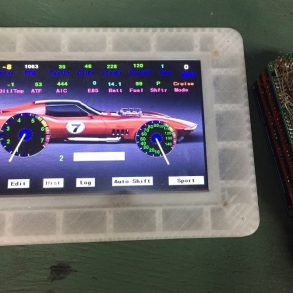
“The engine management in the Vette is an AEM Infinity. It has lots of inputs for sensors and it has lots of wizards defined so it knows all about that sensor’s characteristics. For example it already knows about the resistance table in the GM temperature sensor and how to convert that into degrees. It also has a CANBUS output that AEM uses to supply data to many of their Dashboard displays. They call it AEMNET. AEM, unlike some other aftermarket engine management companies, publish the details of their CANBUS interface so anyone can use it. The Infinity spills its guts over AEMNET every 20 milliseconds. So instead of having to tap into all the sensors with the Arduino board and write code to decipher it, I attached a CANBUS module to the Arduino and read all the sensor info from the AEM CANBUS. Makes my life a lot simpler. I guess that’s why every car made in the last number of years has CANBUS.
This not only makes it easier to implement, but it makes things easier to test. Let’s say I want to test the logic in the transmission controller at 100 MPH and 12 lbs of boost. If I had to test it on the road, it would be dangerous. So instead, I can just send the same exact CANBUS message that the AEM infinity would send at 100MPH and 12 psi of boost to the transmission controller and see what it does.
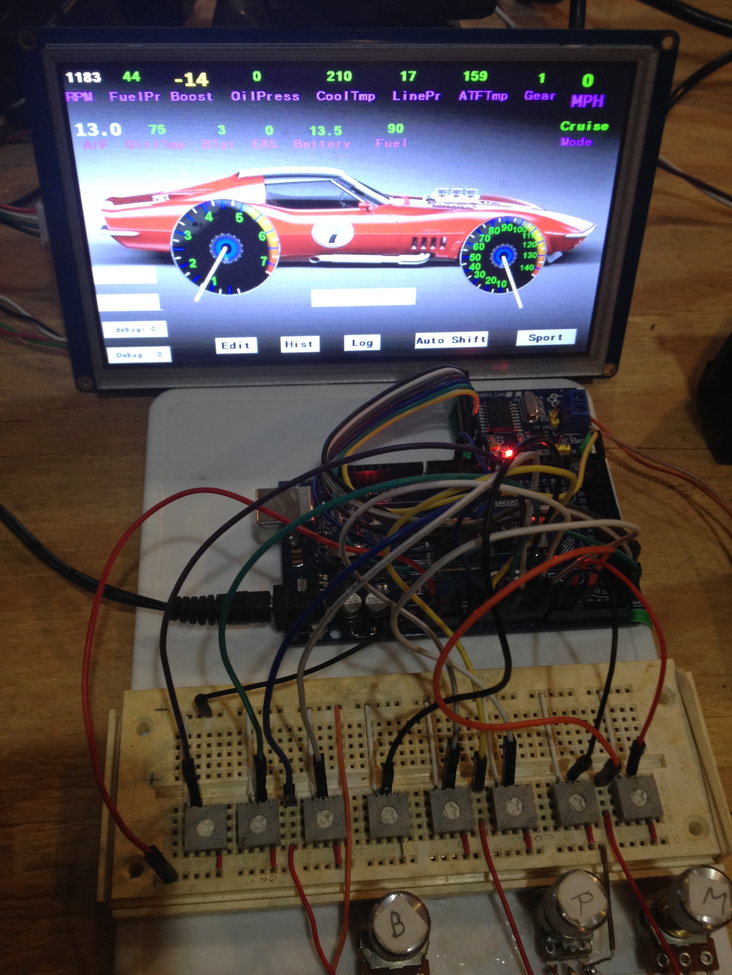
I put together an AEMNET simulator. It’s about $15 in parts. The simulator is universal. It can simulate virtually any CANBUS, if you know what each of the messages should contain.
Here is the CANBUS simulator while I’m testing the transmission controller’s display.”
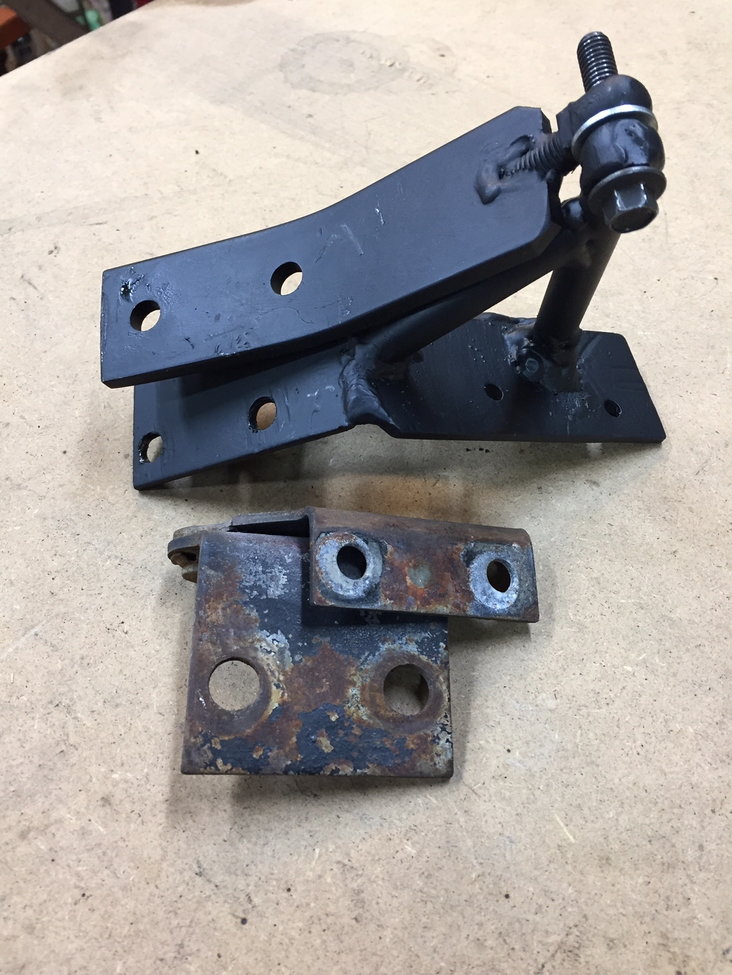
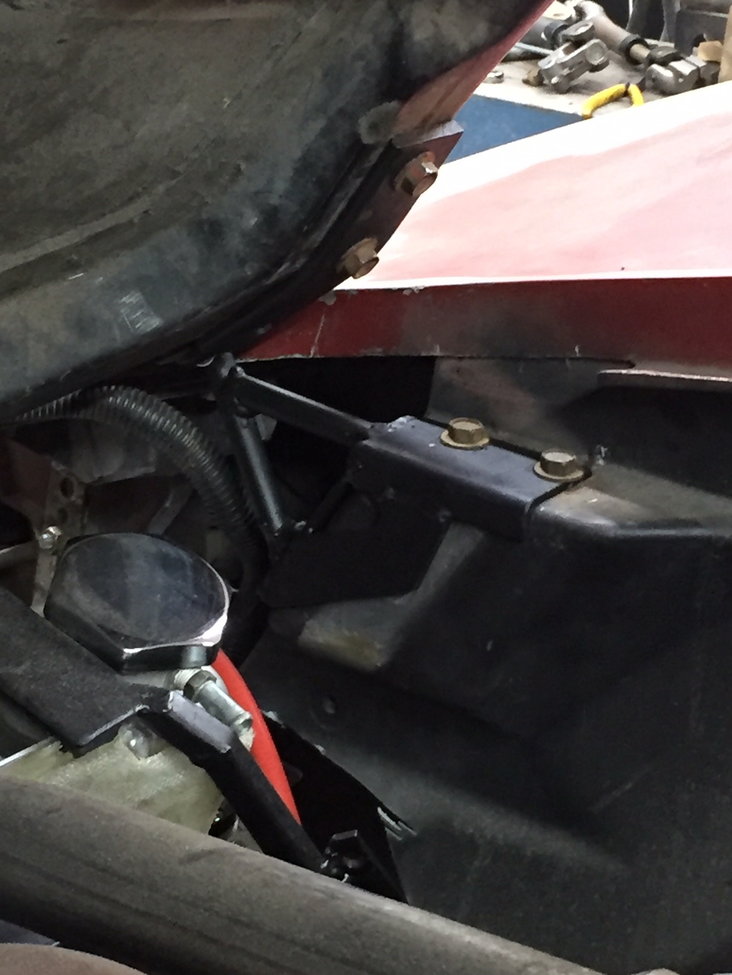
Carl’s intricate technical knowledge is simply amazing, and he takes a breather from the electronics to work on getting more room under the hood as he notes, “The stock C3 hood hinge location forces the nose of the hood to take lots of space up front when it’s open. I want some of that space back for the radiator and intercooler. I fabricated a new hood hinge to pivot closer to the front of the car so that the hood does not dive that deep into the engine bay when it’s open.”
This is a good time to come up for air. Next week Carl will be doing some body work on the front nose, and reconfiguring the intercooler and radiator now that there’s more room under the hood (just to name a few of his projects!). We have the fastest-growing Corvette community on our Facebook page, with over 152,000 followers (33,000 since January!). Come join other hardcore enthusiasts and let me know what you think of Carl’s 10-second turbo build, Douglas B.