

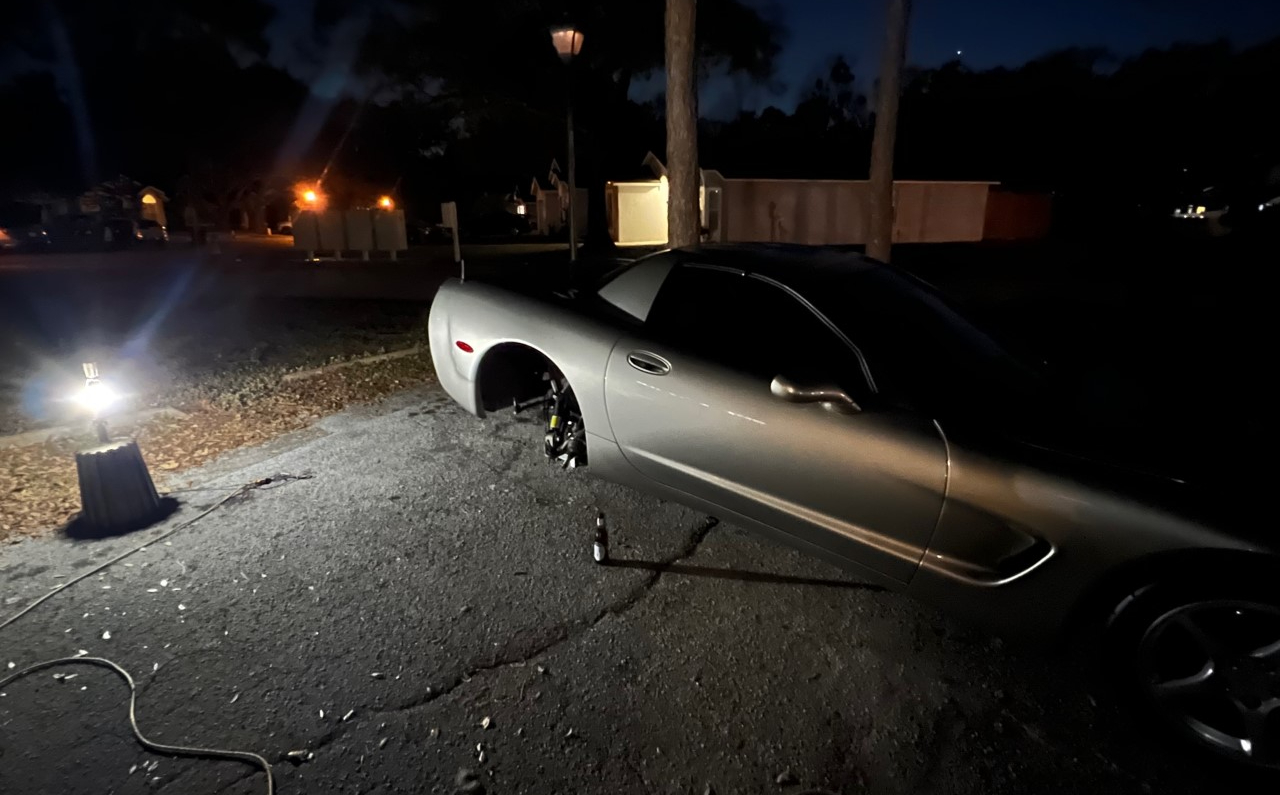
Sometimes us writers get lucky and a story practically writes itself. Most of the time that’s just because we have creative juices in our brains firing on all cylinders. In today’s case, it was because of sheer stupidity. After lowering my new-to-me 2000 FRC on the stock bolts, (there’s a nice feature here), I wanted to get the rear wheels out more flush with the fenders. In the past two-plus decades, I’ve put spacers on previous C5s with no issue, heck I’ve probably logged well over a hundred thousand miles.
But today the simple-mod gods had a different plan for me. If you have a story about a “simple” modification gone wrong, I’d love to hear from you on our Facebook page.
There is something liberating about working on your own Corvette and getting some grease under your fingernails, but this experience was a bit humbling. It all began with this.
![]()
Then quickly went sideways as I tried to torque the lugs down, as I could not get them to tighten to 100 ft-pounds. When the lugs started to get looser instead of tightening I knew it was time to pull the plug on this simple mod. Yes I know, I should have used hub-centric spacers! But I’ve used these quarter-inch spacers before on my C5 rears, or so I thought (maybe they were only 1/8 inch).
Well, time to take the wheel off and assess the damages, and it wasn’t pleasant.
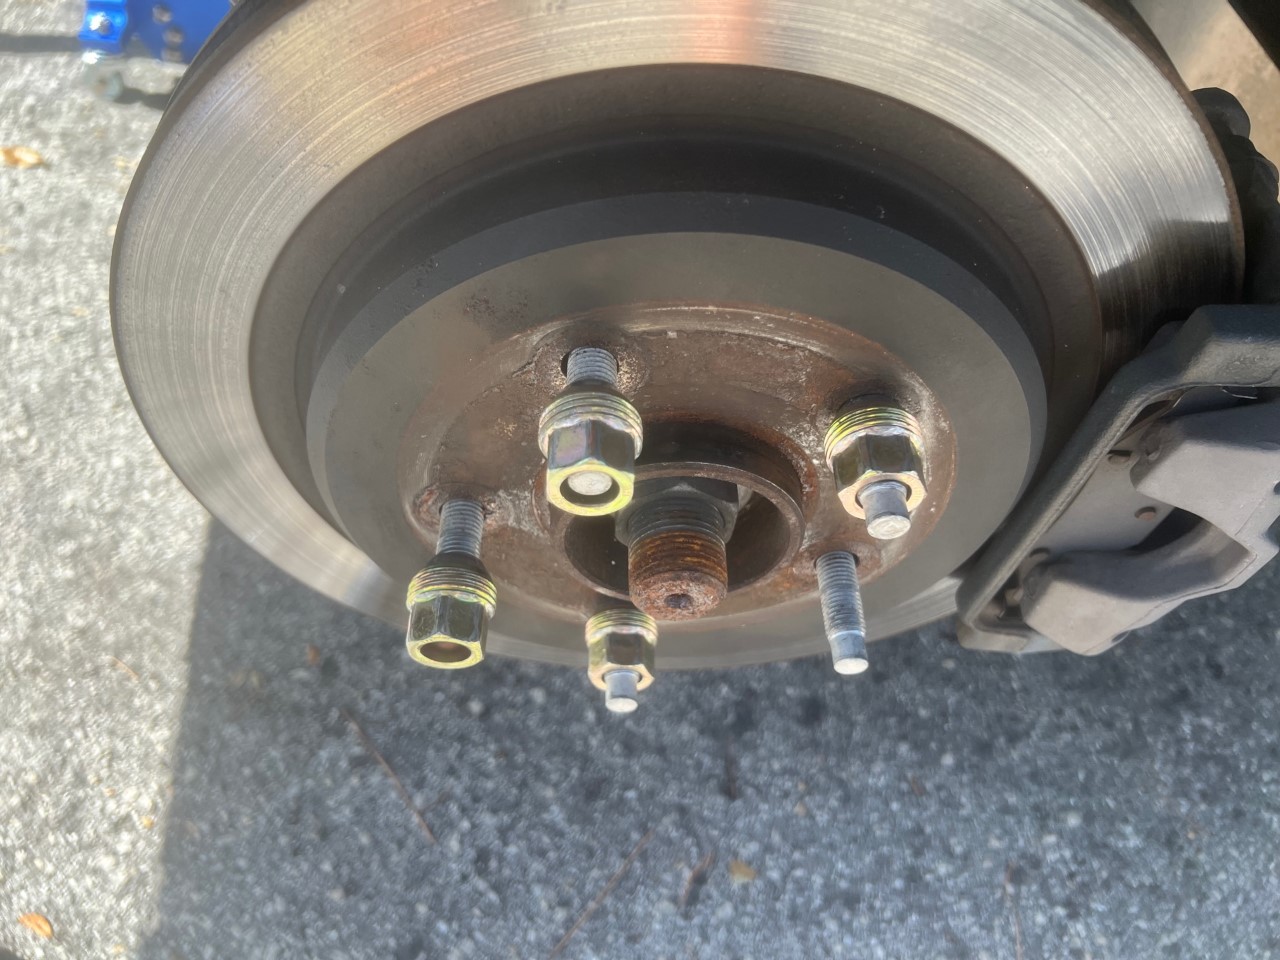
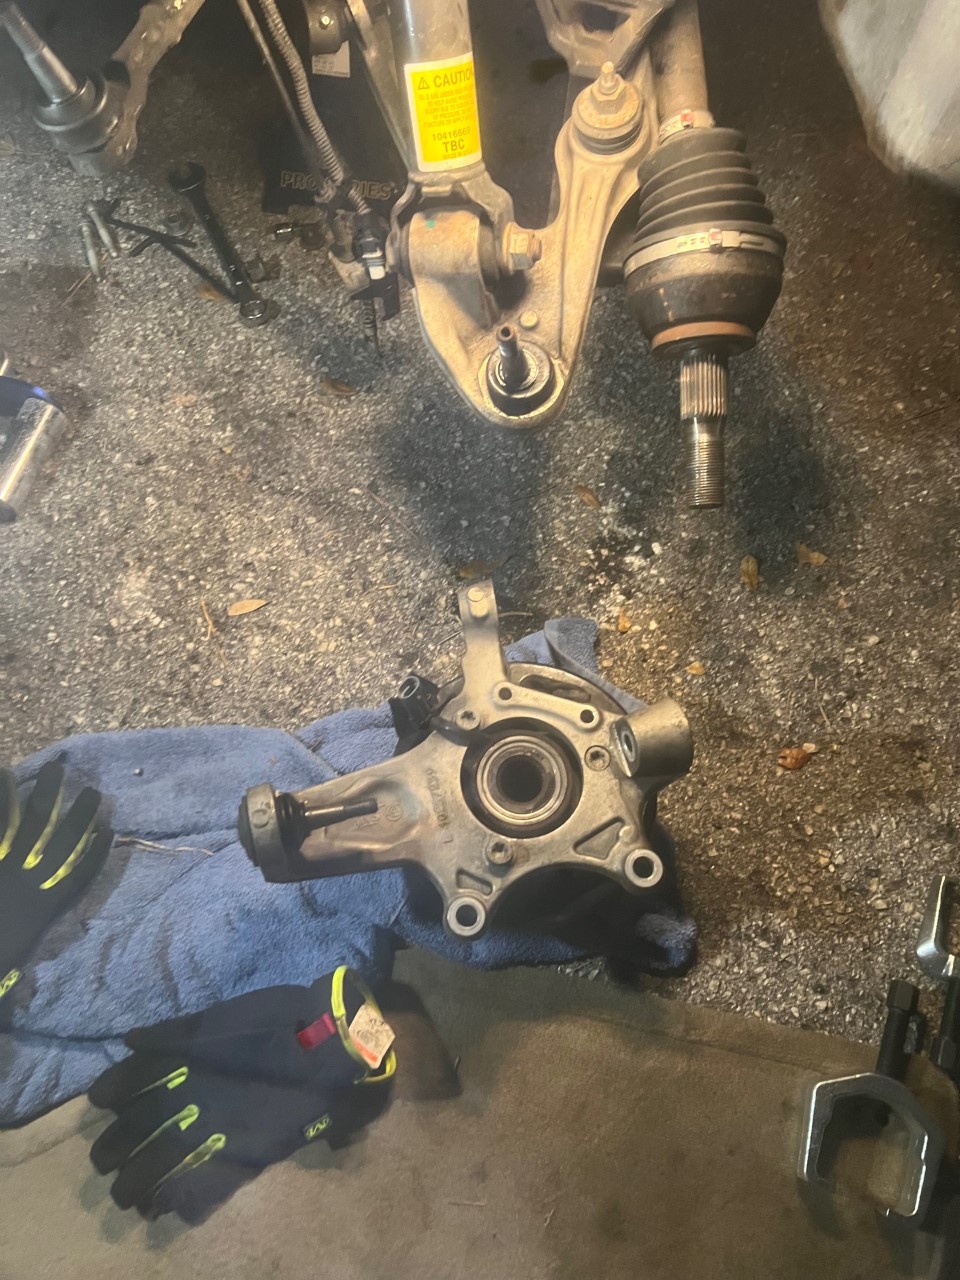
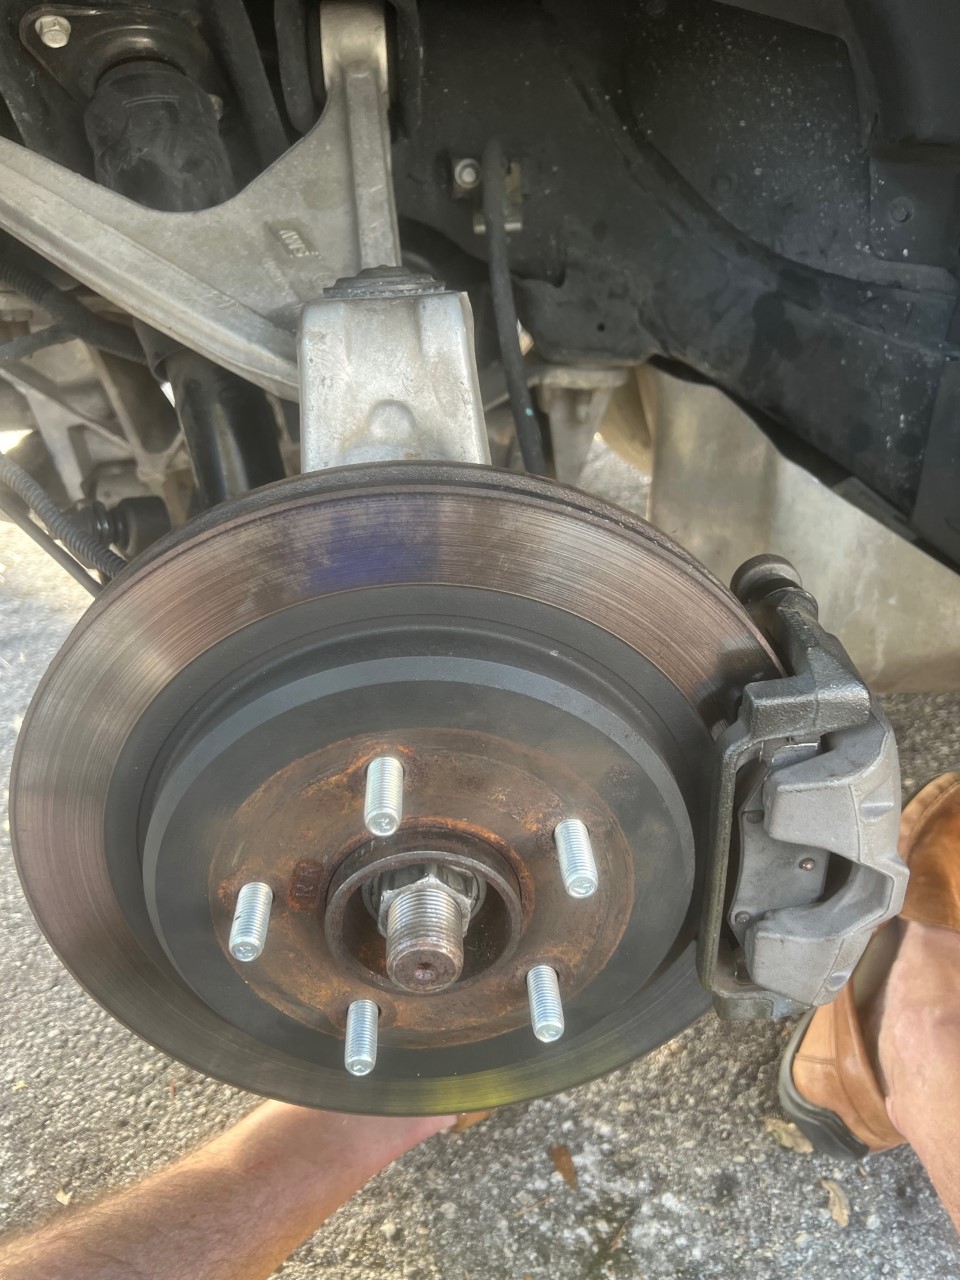
As you can see, only two of the five studs were still good, and I wasn’t even able to get the lug on one. Okay no problem, I’ll just turn this into an opportunity to learn more about my C5! Optimism aside, I had no idea of some of the hurdles I would have to clear.
How To Replace C5 Rear Wheel Studs
Step One: Get a Plan Together
Do some research, find a good Youtube video (posted below), map out a plan, and get all the needed tools together. For this job you will need: a floor jack, jack stands, impact gun, breaker bar, torque wrench, ratcheting wrench, 21mm socket, 19mm socket, 18mm socket, 15mm socket, 18mm open-end wrench (and/or large crescent wrench), 21mm open end wrench, 5mm allen wrench, 6mm allen wrench, T55 socket, ball joint separator (I used a full loaner kit), 33mm axel socket, and a brake piston compressor.
Step Two: Jack Up the Rear Wheel & Remove the Rear Tie Rod
After jacking up the rear and removing the wheel with the 19mm socket, remove the rear tie rod with the 18mm socket and move it out of the way.
 Step Three: Remove the Brake Caliper
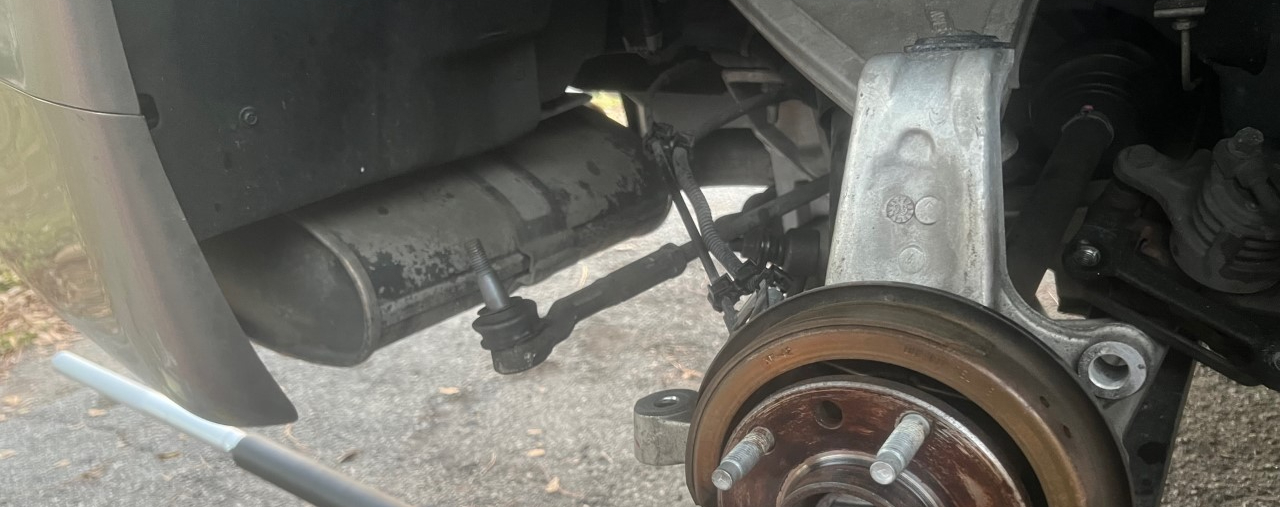
Use the 21mm socket with your impact gun to remove the brake caliper. You can try just a normal ratcheting socket wrench but if they are virgin bolts like mine, you’ll definitely want the impact tool. And unlike me, either have a smaller impact gun or a smaller socket, as this was tight!
 Step Four: Remove the Brake Rotor and Upper Ball Joint
Make sure your e-brake is off and remove the rotor. After that, use the 18mm wrench with the 5mm allen to remove the top ball joint. To release the upper ball joint you can try your jack on the bottom of the knuckle and lift up to release the pressure, but you will need your separator tool if this doesn’t work.
Step Five: Remove the Wheel Speed Sensor, E-Brake Assembly, and Axel Nut
Disconnect the wheel speed sensor and then use your 15mm socket and ratcheting wrench to remove the e-brake assembly (see video starting at 3:45 for better visuals). Now you are ready to use the 33mm socket to remove the axel nut, and this is really where the impact gun will come in useful. Once removed lower your jack.
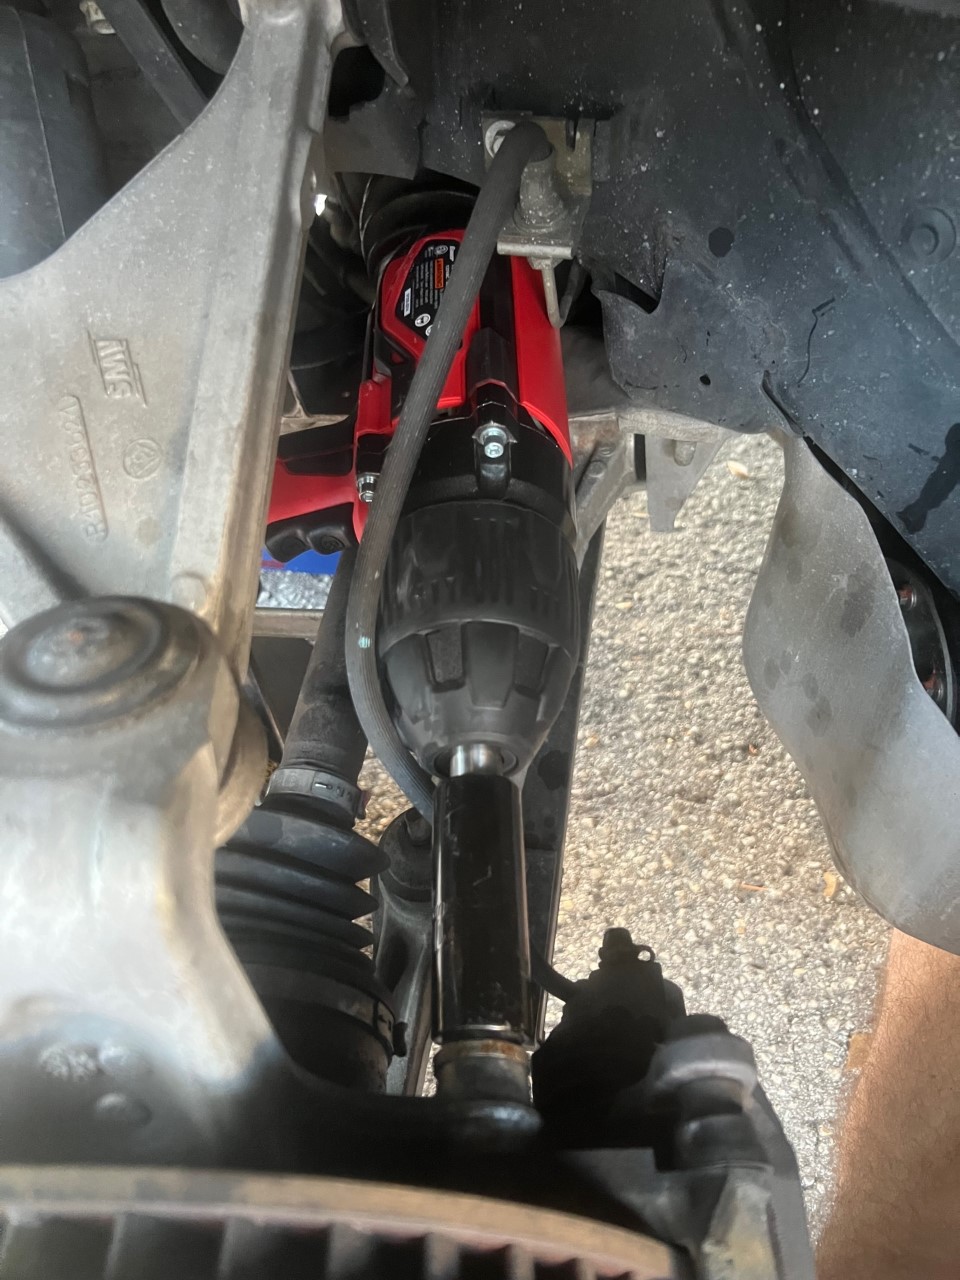
Step Six: Remove the Axle From the Knuckle and Hub
Remove the axle from the knuckle and hub. While a great video, this is where I am going to give you a very useful tip not shown in the video. Starting at around 5:15 in the video you’ll see him wrestling to get the axle out of the hub while the lower ball joint is still attached. It’s tight, but this is where I would recommend disconnecting the lower ball joint first, using the 21mm open-end wrench and 6mm allen, then the ball joint separator. This will make removing the axle much easier.

Step Seven: Remove the Three T55 Bolts on the Rear
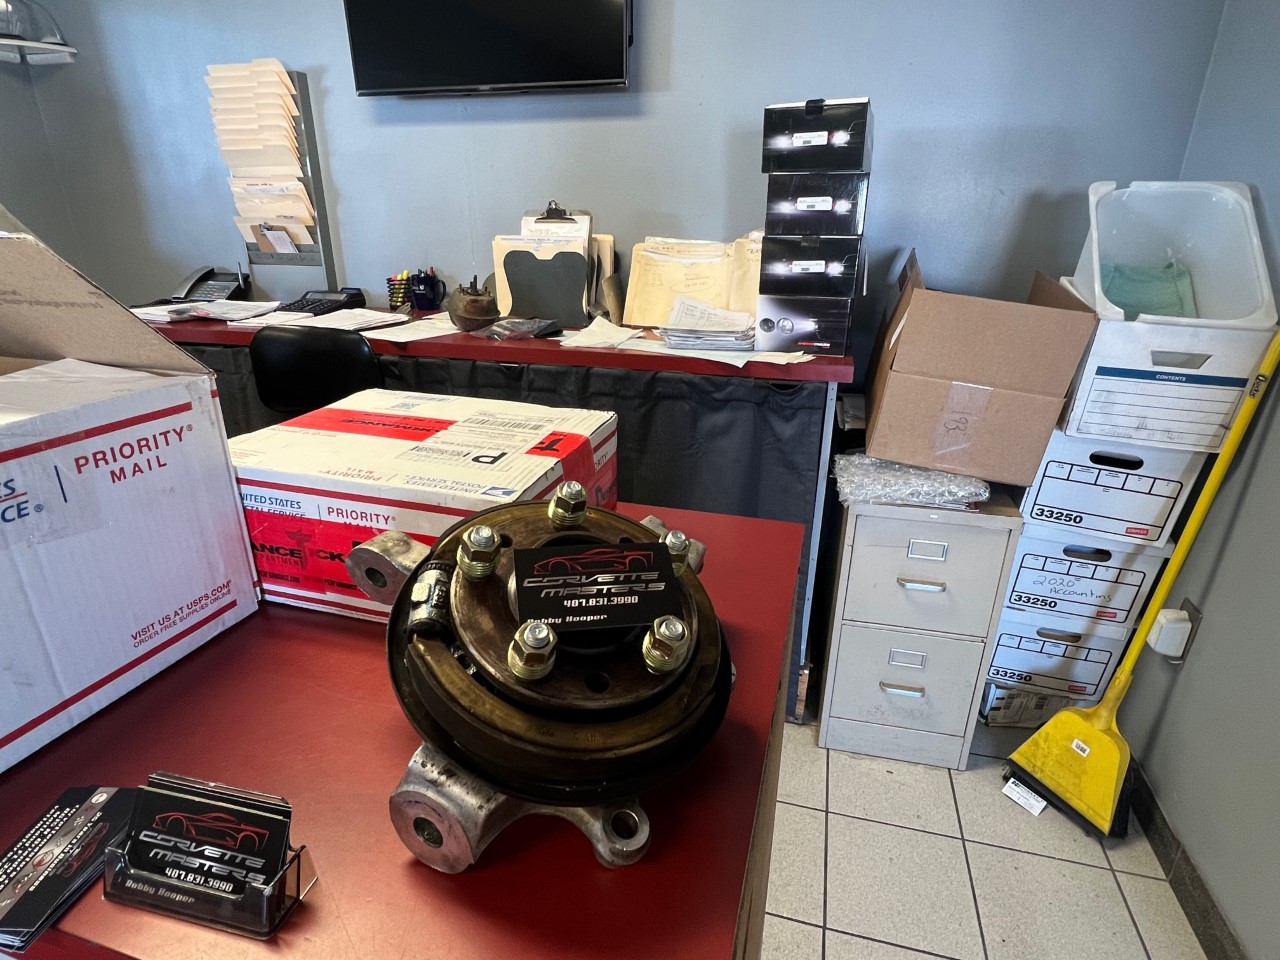
Remove the knuckle to gain clear access to the three T55 bolts on the rear. This is where I had to call in an expert and make a trip to my local mechanic. Despite having an impact gun I could not get the virgin bolts to budge, at all. There are also some regular wrenchers who say you don’t have to remove the axle to gain access to the T55, just drop the lower ball joint. But if you have never broken these three T55 bolts it will be near impossible to do it while on the car.
A quick shout-out to my mechanic for getting the three T55s off. While in there I had him swap out the studs, so please refer to 7:40 in the video for these steps.
Step Eight: Reverse Life & Put it All Back Together
Reverse what you just did and put everything back together. You’ll probably need the brake piston compressor to get the caliper back on.
The last tip I’ll give you before closing out this tutorial deals with that axle again. In the video, you’ll notice he reconnects the lower ball joint before placing the axle back in the hub. I wrestled with it for nearly 30 minutes before my brain asked, hey can you put the axle in FIRST then reconnect the lower ball joint? And the answer is yes. It’s a little tricky with the wrench and 6mm allen, but possible and much easier!
Without further ado, here is the video from YellowVette04 that helped me immensely. As always with Youtube, there are others out there if this one doesn’t speak to you. CorvSport typically has vibrant discussions on our Facebook page, I would love to see you there! Douglas B.
ALL back together!!!

How is this a DIY when you had your mechanic change the studs?
Hey James, thanks for reading the article and your question. You brought up a good point and I revised the DIY part of the title. Hopefully, this guide will be of use to someone doing the job. Douglas B.