John from Massachusetts continues to bring this neglected relic from our Corvette past back to life, and if you missed part one click here. A quick review of the story, as told by John:
“The story that I was told is it was owned by a local Krispy Kreme store owner. He drove the car up until he moved to Florida. When he went down to FL he left it with his mechanic to take care of it while he was away. Fast forward 7 years later and he returned to find the car sitting outside without the tops on it, and it was like that for years. He was so disgusted he had the local scrapyard pick it up and he went back to FL.”
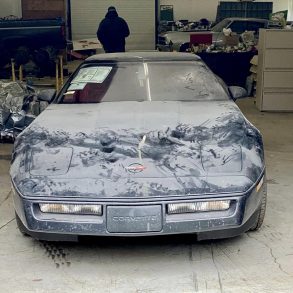
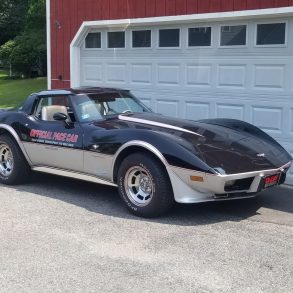
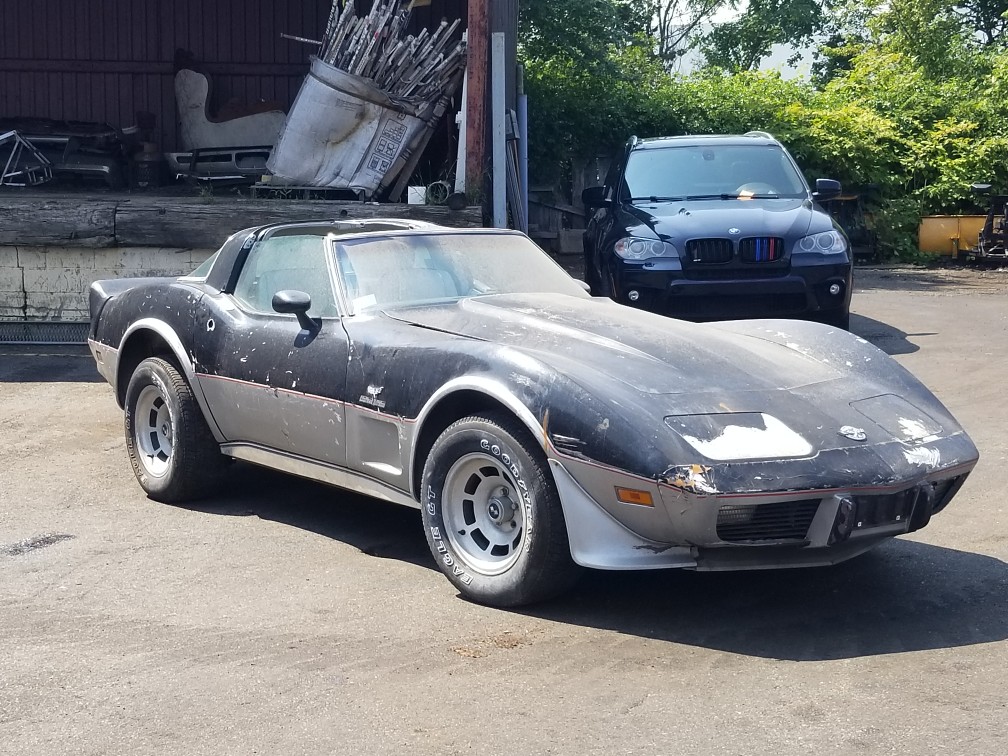
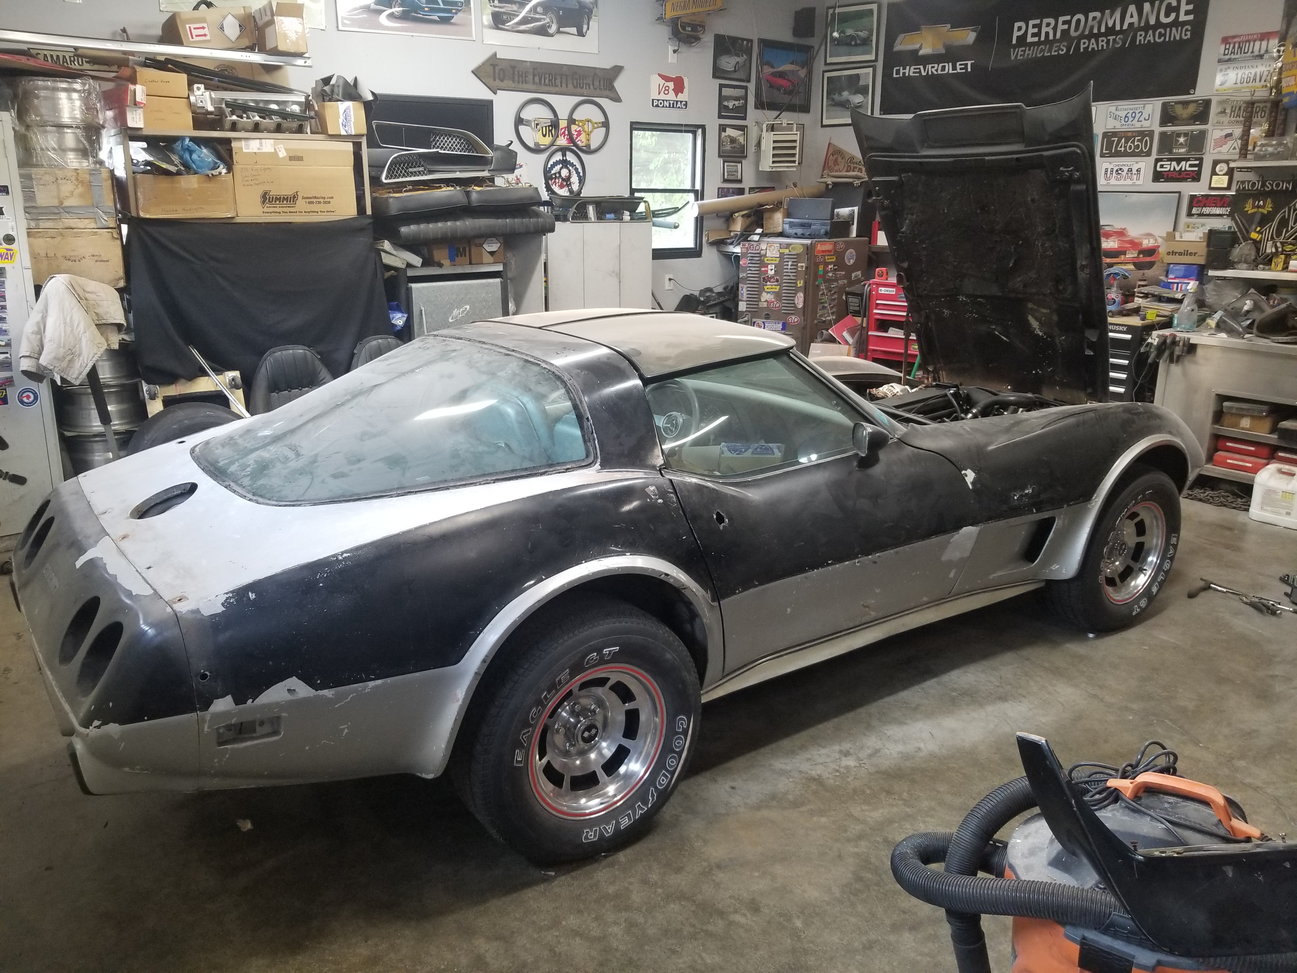
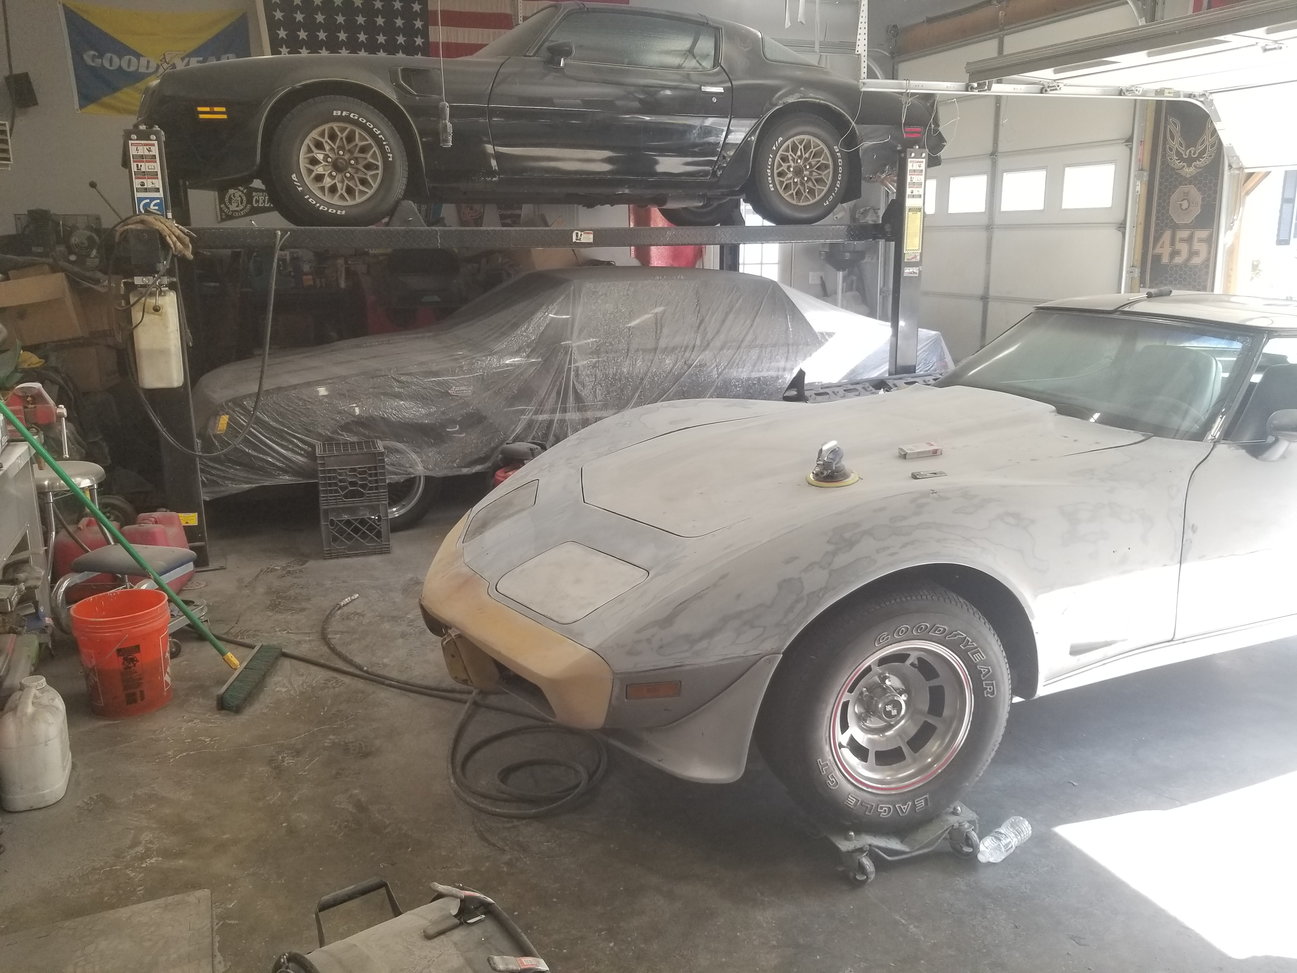
And what he started with.
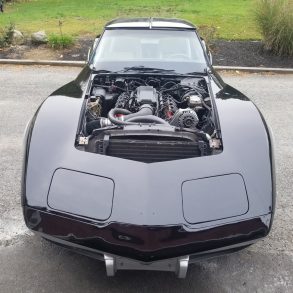
John works fast, and when we left off last week he had already pulled out the original L48, with bigger plans for this Pace Car’s powertrain. If you recall from last week, John scored an LQ4 6.0L out of a 2500HD Silverado and plans on shoehorning it into this classic.
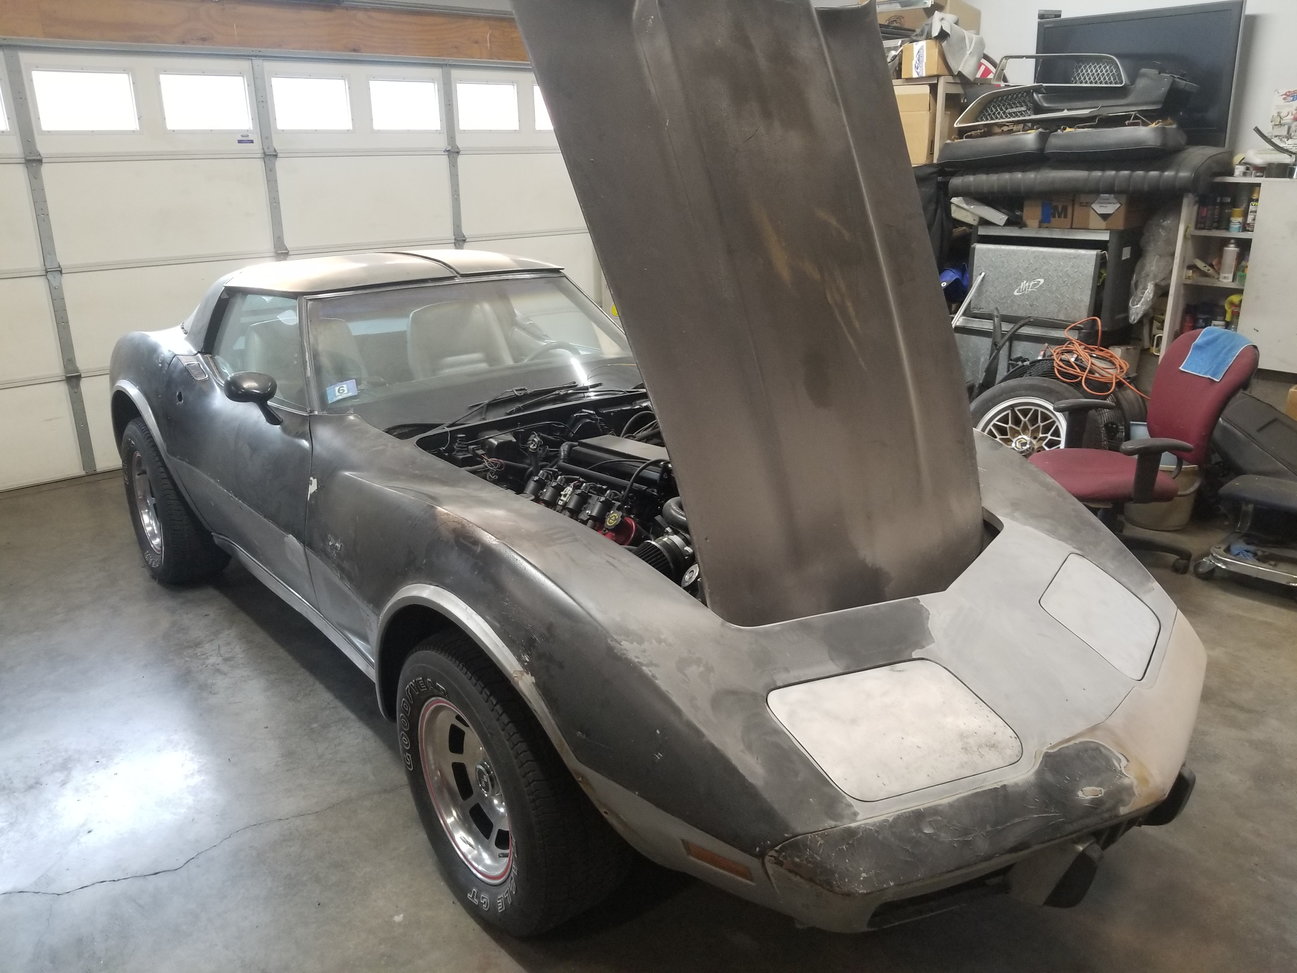
And shoehorn he did!
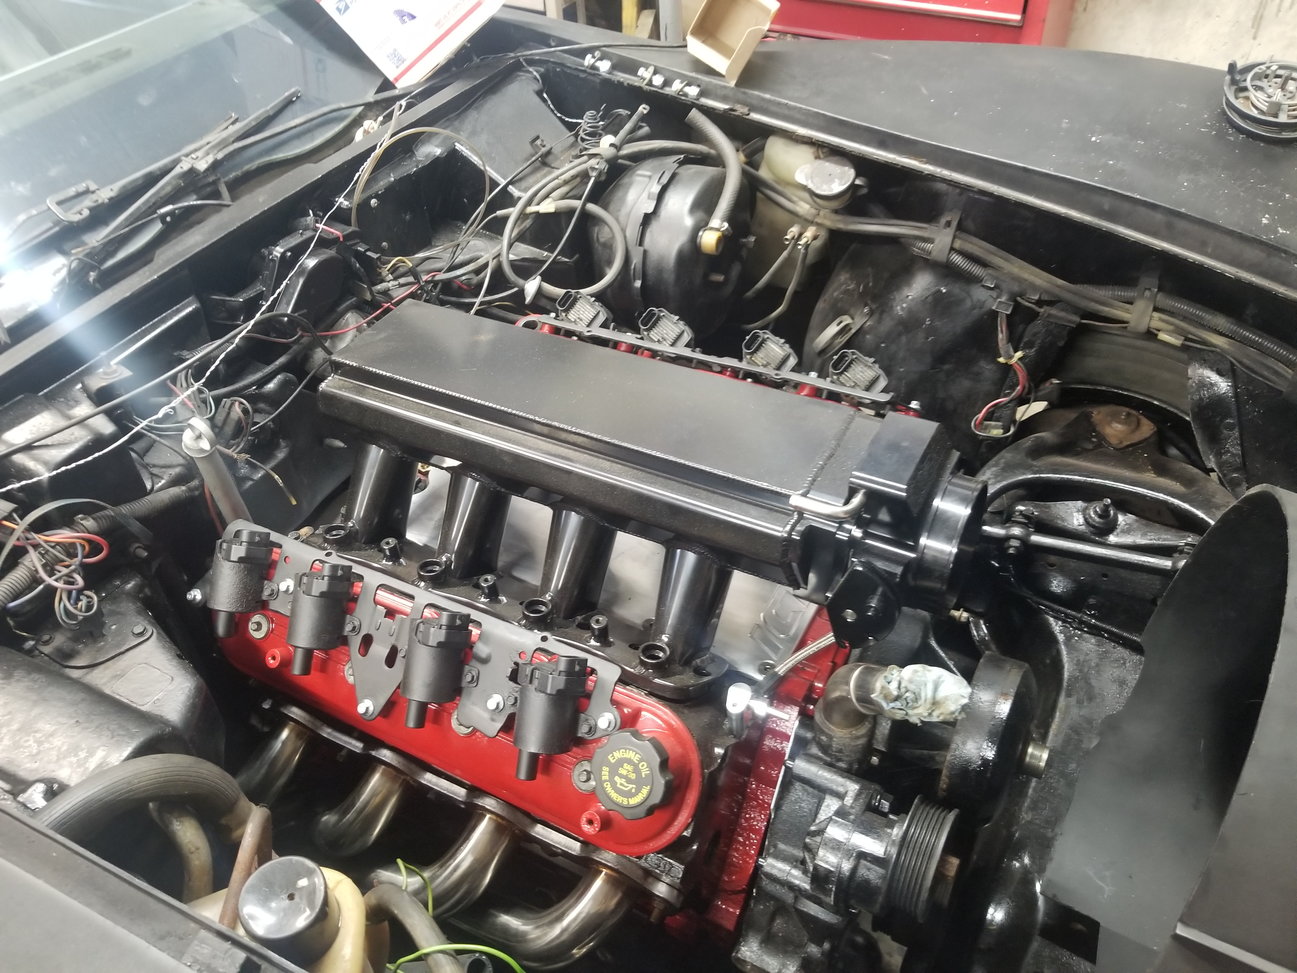
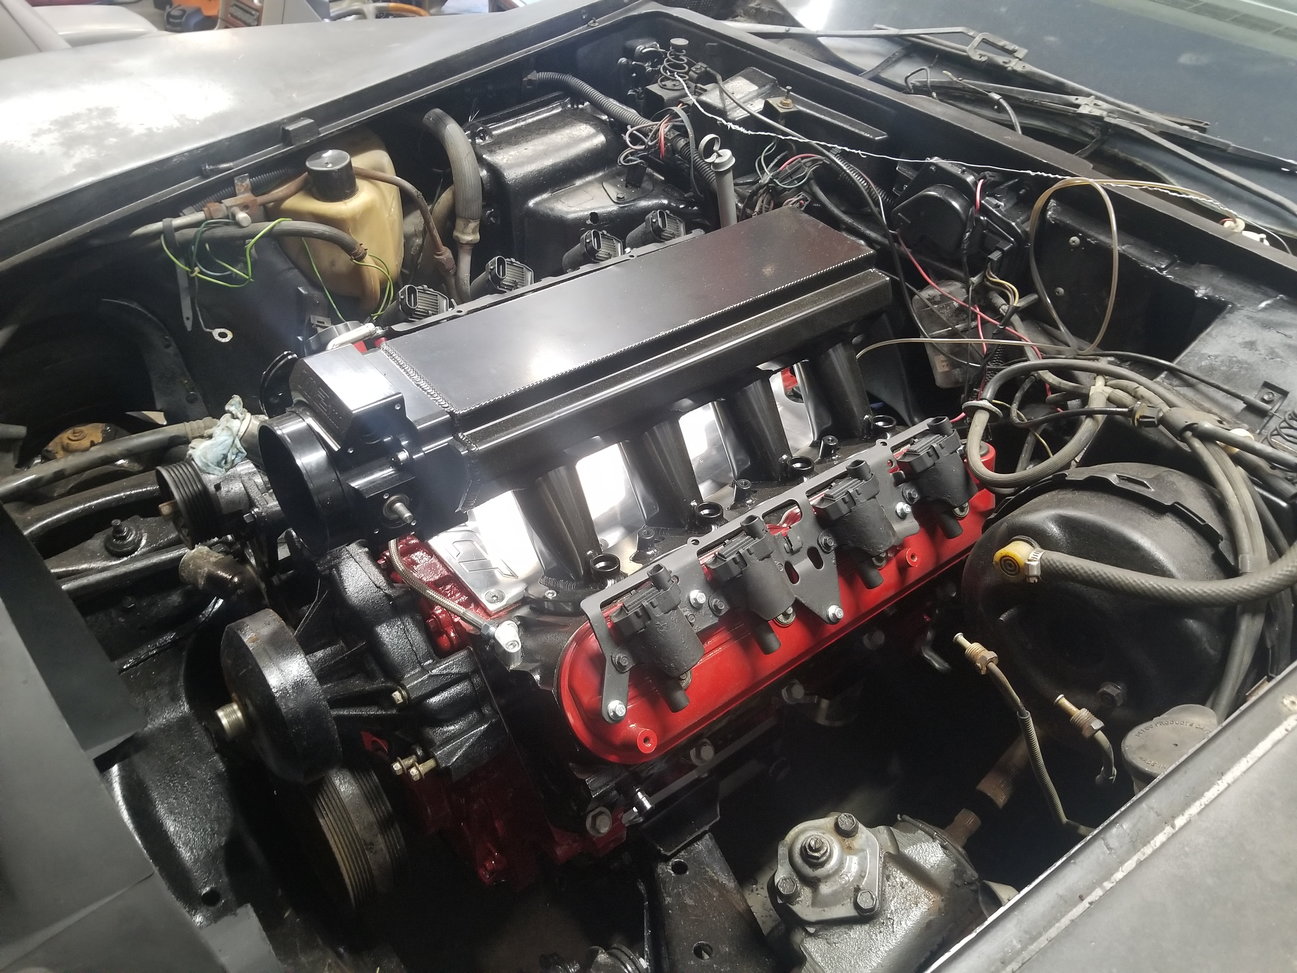
John comments, “The intake clears the hood no problem, and the headers from a 2nd Gen F-Body LS swap fit quite well. I still have to finish up the fuel system, and have to rewire the stock LS harness, but it’s coming along pretty good.”
Now, I understand the purists may scream at John for not keeping this Pace Car all original and numbers matching, but this 6.0 is going to scream (no pun intended), and looks great too! For anybody wondering if a modern GM V8 is a “direct fit” in an ole C3, John remarks, “One thing that I discovered was the heater hose outlets on the water pump stick out directly into the control arm on the passenger side. To solve this I pulled out the stock tubes in the WP and pressed in two small freeze plugs to cap them off. After that I grabbed two barbed fittings and installed them on the top of the WP via drilling and tapping. Aside from the water pump needing to be modified, everything else fits right in like it was meant to be.”
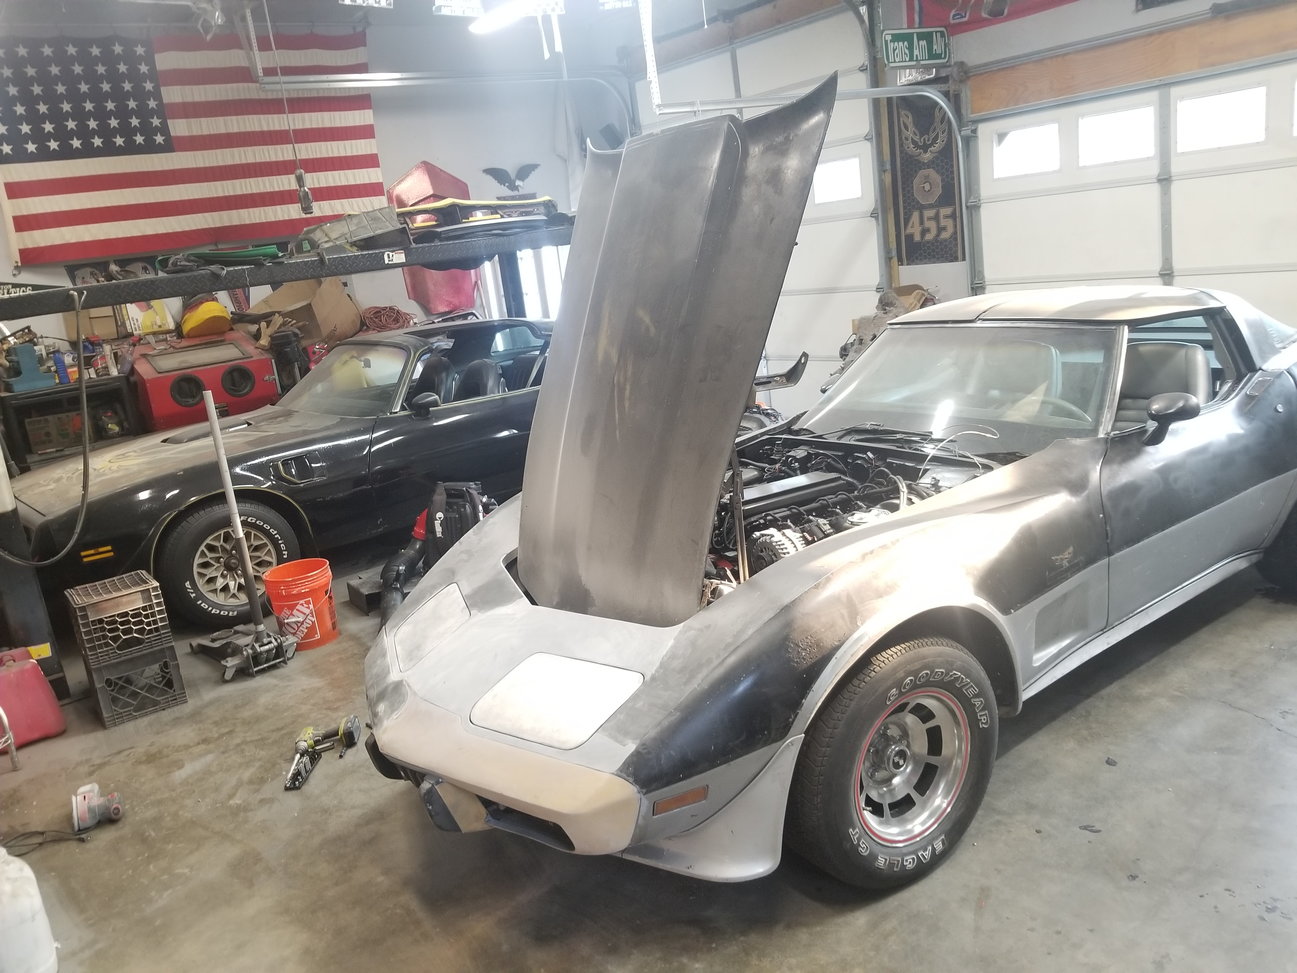
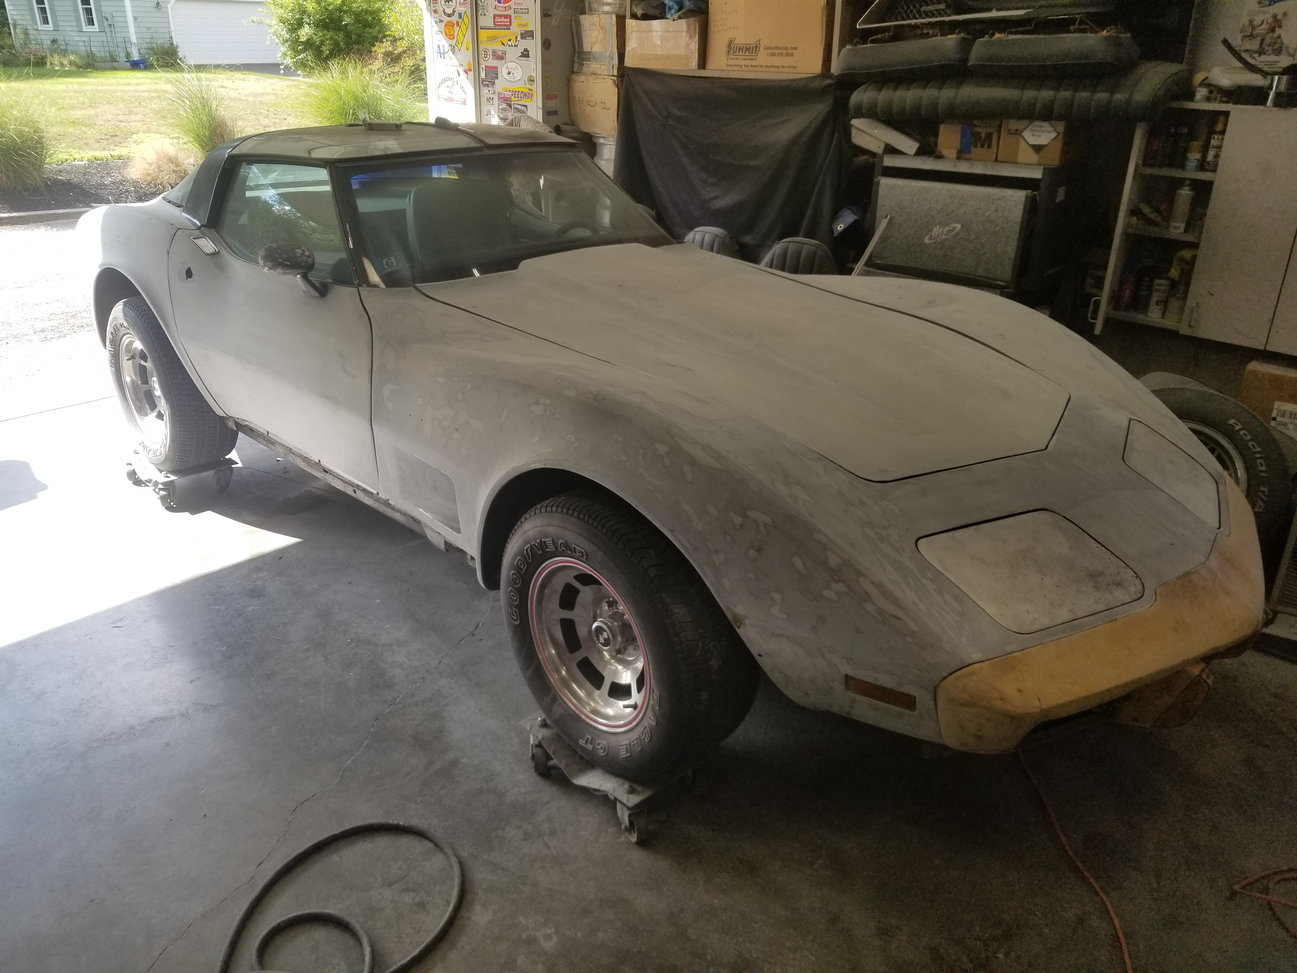
Now, onto some of that bodywork!
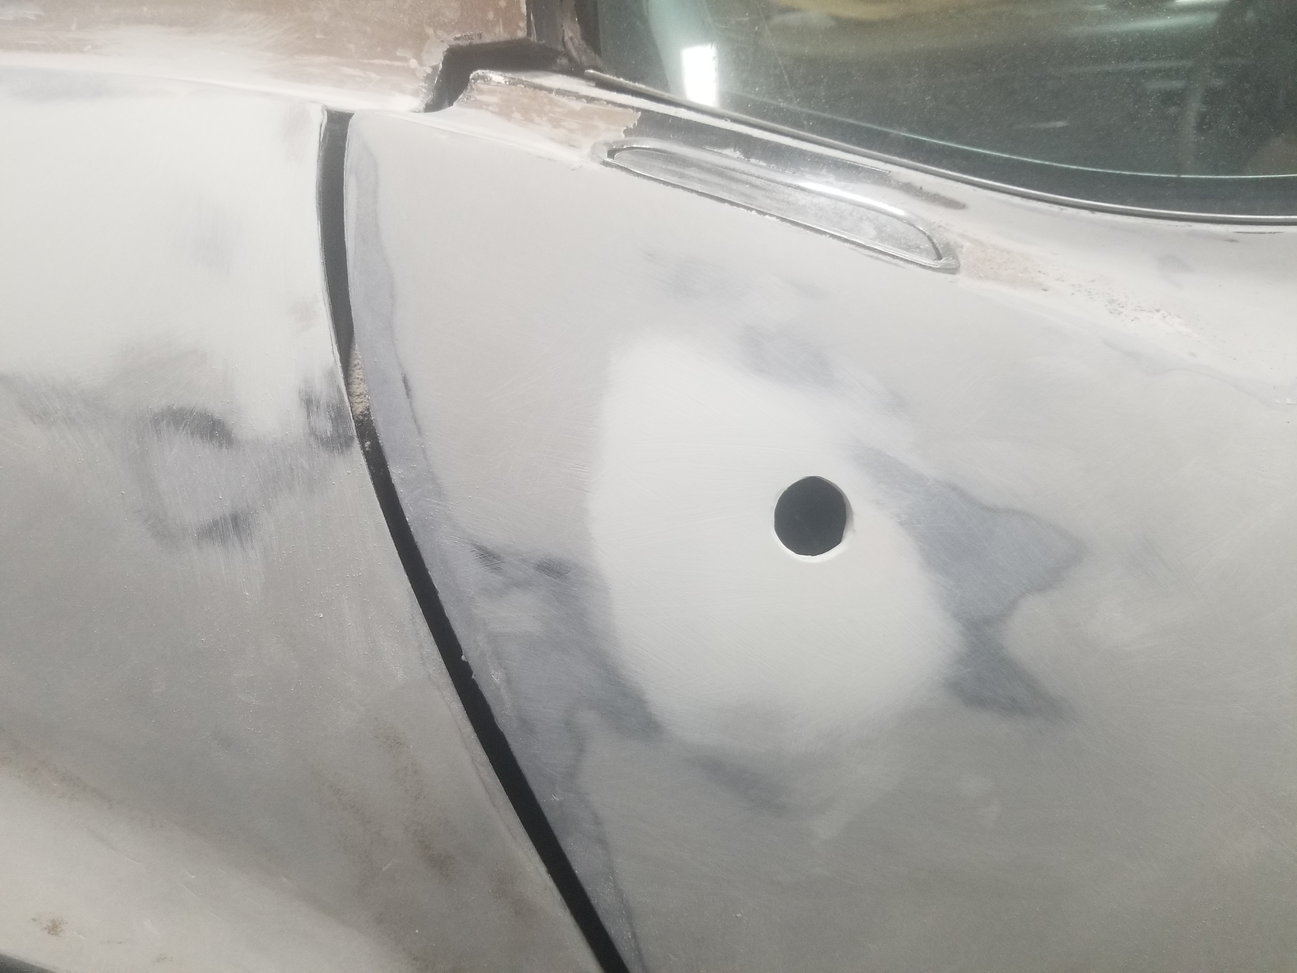
While starting to strip the paint, John says, ” It’s coming off fairly easy. Not much actual bodywork to do besides fixing the blown out lock cylinder on the passenger door… I was just gonna fill the hole completely with new fiberglass and re-drill it afterward.”
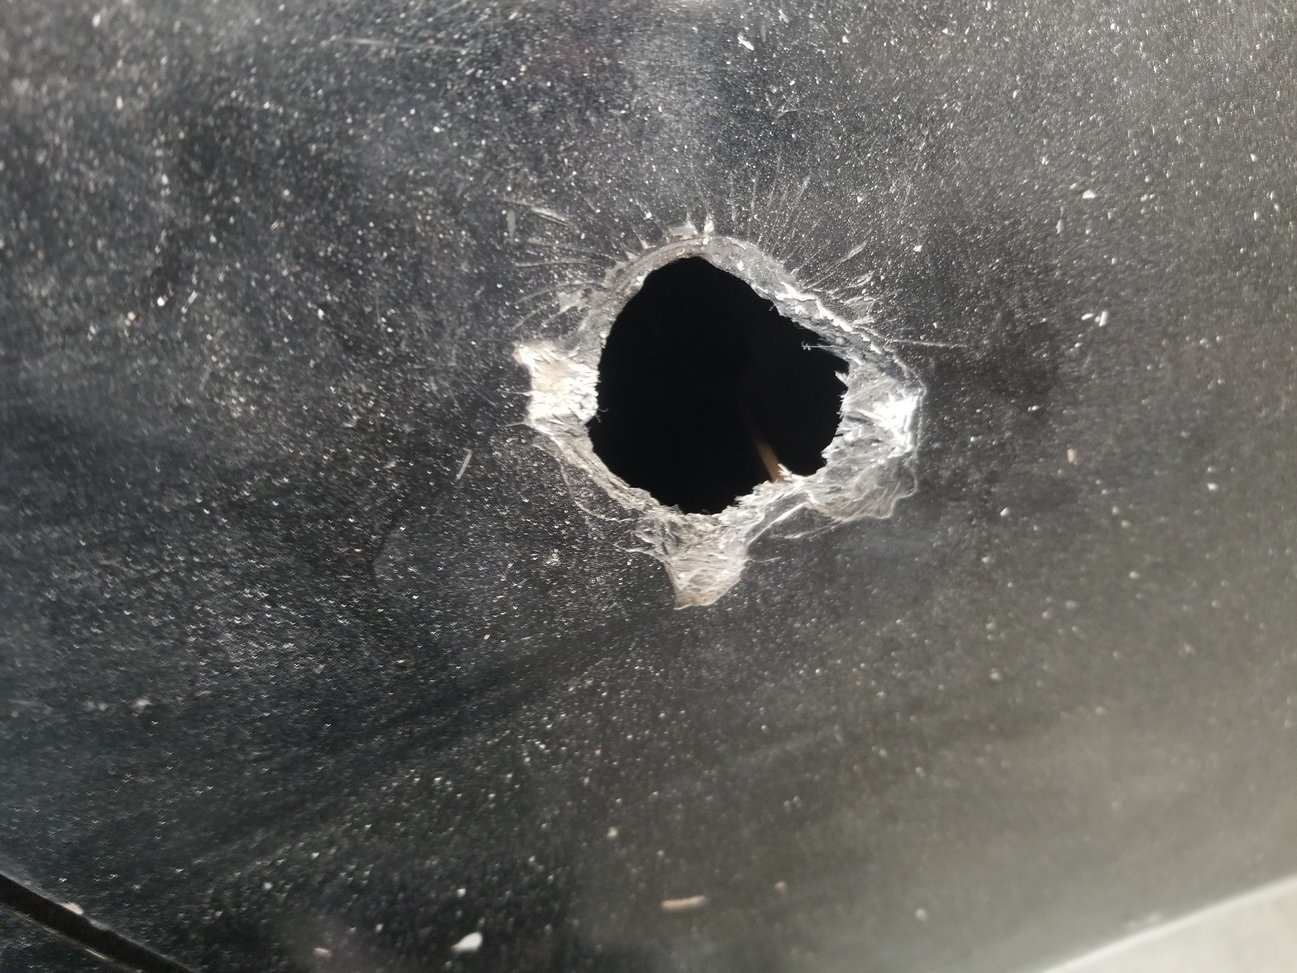
Regarding what caused that blown-out lock cylinder, John speculates “I’m guessing the destroyed lock is the result of the original mirrored tops being stolen. Smashed the lock out and walked away with the tops in mere seconds. It wasn’t stored in the nicest city…I think that was the final straw for the original owner before it got sent to the scrap yard.”
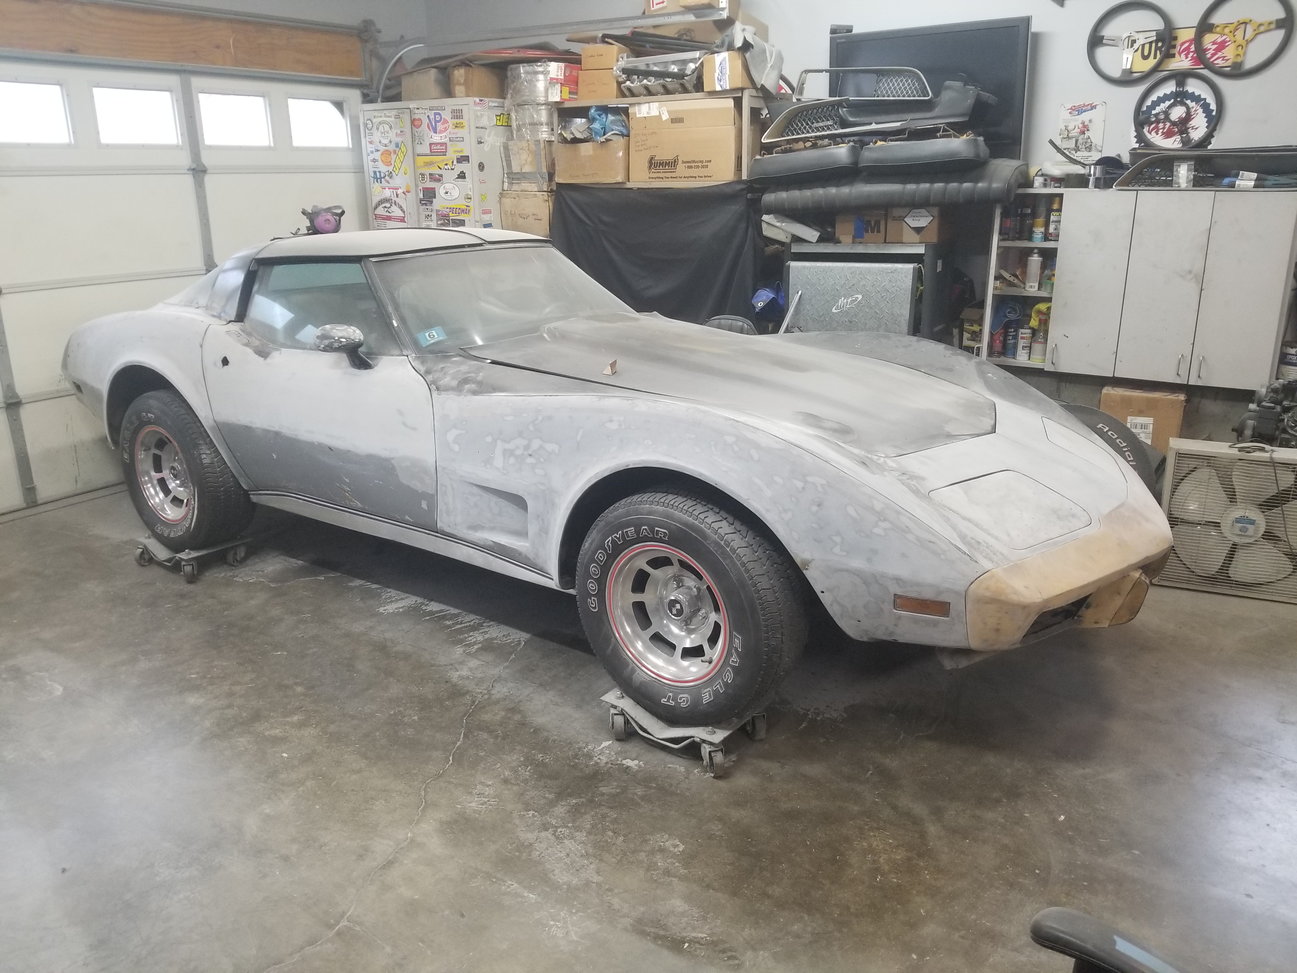
Time to get back to work with more sanding, and John notes, “It’s actually coming off pretty easily. Being the original paint makes it nice as there’s not layers and layers of crap to sand through. So far no major damage to speak of. Looks like all original panels.”
Regarding that blown-out lock cylinder, John came up with a nice-looking solution, and comments, “Got the door lock opening 90% done. Ended up fiberglassing the broken part into shape, and took a 1/2 socket wrapped in 80 grit sandpaper to make the opening perfectly circular. Now I need to file in the notches that center the lock and hold it in place.”
Great progress so far John! Next week he continues the tedious and time-consuming process of prepping that curvaceous C3 body for paint, so I hope you join me. We have an active community on our Facebook page, I would love to hear from you! Douglas B.